![]()
![]()
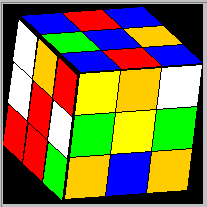
Yet another description of how to solve the cube. My solution was strongly influenced by conversations with Jeff Varasano, back in the early 80's when the cube was still popular...
This solution is optimized for visual speed, because the slowest part of solving the cube is not making the moves, but locating the pieces to place. Hence it is very color oriented, using easy-to-spot patterns instead of more difficult questions most solutions normally require, such as "where is the correct position for this corner relative to its center pieces?"
With a good cube, I was averaging (in 1981) 26 seconds over 100 attempts. Today, with a bad cube and out of practice, I would probably average around 45 or 50 seconds.
The strategy is as follows:
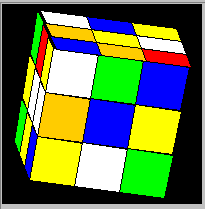
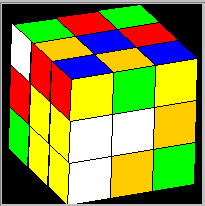
In the illustrations accompanying this page, I've selected the color BLUE as the target color when possible, so that is the color you should pay attention to unless otherwise indicated.
During this solution, I've included instructions for both the expert cubist (fastest possible solution, but requires lots of memorizing), or for the beginner (memorize only four easy patterns to solve the whole cube, but takes much longer).
![]()
These are the symbols used in the moves described below. Should be pretty obvious. The pictures represent the cube as if you were looking at it straight on, at eye level. In all cases, the pictures below represent turning just one slice of the cube.
![]()
![]()
![]() The front face clockwise, counterclockwise, and
twice.
The front face clockwise, counterclockwise, and
twice.
![]() The back face twice.
The back face twice.
![]()
![]()
![]()
![]() Horizontal slices to the
left
Horizontal slices to the
left
![]()
![]()
![]() Horizontal slices to the right
Horizontal slices to the right
![]()
![]()
![]()
![]()
![]()
![]() Vertical slice moves
Vertical slice moves
(can you tell I'm righty? Feel free to transpose the listed moves to have a more left-handed emphasis).
Also note: any double moves (with a 2 on them) can be turned double in either direction. Sometimes it's more natural to turn double in another direction than pictured; I just didn't want to draw pictures for every possibility -- lazy me.
![]()
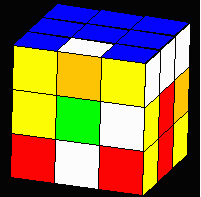
You're on your own here. Get a single X on one side of the cube, by positioning the corners and the center piece on the same side. Note: all that matters is to get an X of a single color, the position of the corners relative to each other does not matter!!
 A blue 'X' formed by 4 corners and a center.
Choose any color you like.
A blue 'X' formed by 4 corners and a center.
Choose any color you like.
![]()
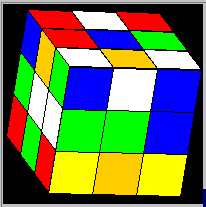
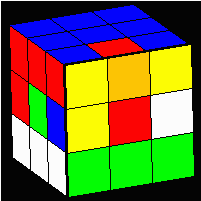
Turn the cube over, so that the side with the completed X (from step 1) is facing away from your, and count the number of corners that are correctly twisted (i.e. touching the blue center piece). If the bottom X is not already solved, you will see one six possibilities (note, we are again using BLUE to illustrate the new target corners and center). When comparing your configuration with the pictures below, take into account all visible blue corners shown, even those not on the bottom side.
For each possibility, we have listed a direct solution, and, for those who don't want to memorize many complex moves, we have also listed how the configuration can be solved by multiple combinations (at most 3) of an easy to remember move, labeled BX-1. If you remember the inverse of BX-1, you can solve each position in at most two executions of BX-1 and BX-1 Inverse.
1.  One corner correct: Hold as shown and apply
BX-1.
One corner correct: Hold as shown and apply
BX-1.
BX-1: ![]()
![]()
![]()
![]()
![]()
![]()
![]()
![]()
 If your position better matches this picture
(check remaining corners), read below
If your position better matches this picture
(check remaining corners), read below
This position can either be solved by holding the cube as in the larger picture above, and executing BX-1 twice, or else holding it as displayed in this picture and executing BX-1 Inverse:
BX-1 Inverse: ![]()
![]()
![]()
![]()
![]()
![]()
![]()
![]()
2. Zero corners correct, remaining corners
paired.
Zero corners correct, remaining corners
paired.
Hold as shown (target side on top):
Fastest:![]()
![]()
![]()
![]()
![]()
or
Easy: 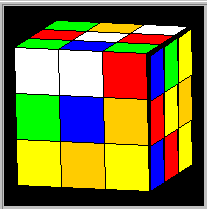 BX-1 + turn cube as specified above
for 1 corner + BX-1
BX-1 + turn cube as specified above
for 1 corner + BX-1
3.  Zero corners correct, separated.
Hold as shown (target side on top):
Fastest:
![]()
![]()
![]()
![]()
![]()
![]()
![]()
![]()
![]()
![]()
![]()
or
Easy:  BX-1 + turn cube + BX-1
4. Two corners correct, remaining corners
separated.
Two corners correct, remaining corners
separated.
Hold as shown (target side on top):
Fastest:![]()
![]()
![]()
![]()
![]()
![]()
![]()
or
Easy: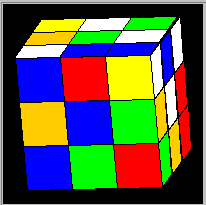 BX-1 + turn cube + BX-1 Inverse
5.  Two corners correct, remaining corners
together.
Two corners correct, remaining corners
together.
Hold as shown (target side on top):
Fastest: ![]()
![]()
![]()
![]()
![]()
![]()
![]()
or
Easy:  then BX-1 + turn cube + BX-1 Inverse
6.  Two corners correct, diagonal.
Hold as shown (target side on top):
Fastest: ![]()
![]()
![]()
![]()
![]()
![]()
![]()
or
Easy:  then BX-1 + turn cube + BX-1 Inverse
![]()
Note: you might wonder "where do these (fastest) patterns come from? Did they just miraculously appear in someone's head? If I don't like the patterns you gave, how can I make up my own?"
The strategy for making up new patterns is very simple:
You might ask: how do I know that the list of possibilities for bottom X configurations listed above is complete? Well, on the cube (according to group theory), it is not possible to flip only a single corner -- other corners are implicated. The two minimal flip possibilities are: three corners flip in the same direction (e.g. clockwise or counterclockwise), or two corners flip in opposition directions (one clockwise, one counter). So, given that four of the corners are guaranteed to be correctly flipped (you already have one X), the resulting positions are everything you can do using these two minimal flip primitives.
Similar logic and rules apply to moving corners, as well as positioning and flipping edges, all of which we will see very soon...
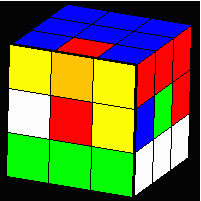
![]()
Now that we have a top and bottom X, count the number of pairs along the top and bottom edges of the cube. A pair is when both corners along either the top or bottom edge of the cube are the same color.

After counting all the pairs along the top and bottom edges of the cube, you will have one of the five following possibilities:
Hold cube with the X's on the top and bottom:
![]()
![]()
![]()
Hold pair on upper left side of cube
![]()
![]()
![]()
![]()
![]()
![]()
![]()
![]()
![]()
Fastest: Hold both pairs in front of cube
![]()
![]()
![]()
![]()
![]()
![]()
![]()
Easiest: Hold both pairs on the left side of the cube and do 1 Pair + 0 Pairs + 1 Pair.
Fastest: long and complicated, don't bother. 4 Pairs is pretty rare.
Easiest: 2 Pairs twice, starting from anywhere or 1 Pair twice, starting from anywhere.
Fastest: Hold four pairs on the bottom and one pair on the upper left side of cube
![]()
![]()
![]()
![]()
![]()
![]()
![]()
![]()
![]()
![]()
Easiest: 0 Pair + 1 Pair
![]()
Choosing one side as the top, fill in three of the edges so that they are correctly positioned. The last edge position will serve as a keyhole, which we will use to fill in the bottom side. Make sure that you do not lose the corner alignments when filling in edges (you should always have 8 pairs).
 Three edges on top side completed, one
remaining "keyhole"
Three edges on top side completed, one
remaining "keyhole"
![]()
Fill in the bottom edges using this basic strategy:
Note: If there are no available target pieces on the middle horizontal slice, move one there by moving some badly positioned piece under the keyhole, turning the front face once, moving the piece out onto the middle slice, and repositioning the front face.
![]()
Now, all that remains is to fill in the keyhole. Move the keyhole (target) to the top front. The missing (blue) piece to move will be somewhere on the middle horizontal slice. Turn the middle horizontal slice, until it looks like one of the following two pictures, with the blue (top) color either just to the left or right of the front face (but not on the front face itself).
 OR
OR
If it looks like the left picture, then do the following sequence:
![]()
![]()
![]()
![]()
![]()
![]()
![]()
If it looks like the right picture, then do the inverse, which is:
![]()
![]()
![]()
![]()
![]()
![]()
![]()
![]()
Hold the cube with the two finished sides on the left and right, and consider the remaining edges of the vertical middle slice.
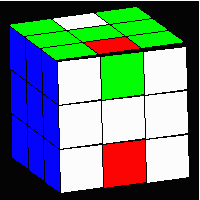 Only the center slice edges are left!
To cycle three edges, hold the edge that shouldn't move in the lower back area of the cube.
EC-1: Edge-cycle: ![]()
![]()
![]()
![]()
EC-1 cycles the edges in a triangle downwards. Either position the cube so that EC-1 will solve this in a single execution, or else just execute EC-1 twice.
To swap four edges with each other (top two switch and bottom two switch):
Fastest: Edge-swap: ![]()
![]()
![]()
![]()
or
Easy: EC-1 plus EC-1.
![]()
To flip two edges, hold the edges to be flipped on the top side:
EF-1:
![]()
![]()
![]()
![]()
![]()
![]()
![]()
![]()
![]()
![]()
![]()
![]()
Note: you may need to flip four edges; in this case, just flip them two at a time using EF-1 twice.
If the two corners which need to be flipped are diagonally opposite each other, hold the cube so that one of the corners to be flipped is in the lower front part of the cube and then do:
![]() plus EF-1 plus
plus EF-1 plus ![]()
![]()
There are also "fastest" moves for performing the two last steps (positioning and flipping edges) in a single step. I think I'll leave this as an excercise for the readers to derive...
Hint: position an edge where you'd like it, move another bad edge into its place, now reverse the original move to restore the cube.
![]()